Showing posts with label technique. Show all posts

Tuesday, March 10, 2009

The gear I use and how I use it.

I get e-mail etc about the gear I use on a fairly regular basis (I don't claim to be an expert or pro, the explanation below is my experience, yours may differ). Usually the question is “what camera do you use”. I respond that I use such and such camera, and that is the end of the conversation (most of the time). So many times it easy to believe that the camera is what creates great photos (after all the camera manufacturers tell us that when they market the cameras to us). The right question to ask when you see a great photo, is to question how that person took the photo, how the photographer used the camera.

My intention in sharing my gear is to help out in understanding what benefit I get from the different pieces of gear I use. I want to show how I use different pieces of gear in my bag.

One suggestion: if are serious about photography, get a DSLR. Any brand will do but a DSLR gives you flexibility that you can’t get from traditional point and shoot cameras (though some are getting close)

My cameras:

I use a DSLR (note that most manufacturers have equivalent bodies, lenses etc. sorry this is so brand specific). I started out with the D40 which I still use today (yup the beginner DSLR by Nikon), and later bought a well used D70 camera body off ebay (mainly for the 18-70 kit lens and because I wanted a second body). As far as I am concerned the camera body makes the least impact on your photos compared to other photo tools you could acquire. Some will argue the point, I don’t have any experience with the expensive bodies so I am unqualified to comment on bodies. From my view point the camera body isn’t where you should focus your dollars. When you get the other items (read below) then upgrade the camera body.

My gear
Click on the photo above to see notes on the photo

My lenses:
I really only use three lenses for my shooting, the 18-55mm doesn’t see much use anymore. Not because the 18-55mm is inferior, the 18-70mm wins due to the lens hood, slightly faster aperture and better reach. The other two lenses I use are the 55-200mm VR and the 50mm 1.8 Nikkors. These are the lenses I use and have. The lenses are cheap, and they work well.

So this deserves a side bar… Am I happy with these lenses? Sort of, they are great because they are light weight and compact (I will keep them when I upgrade lenses so I have a light weight travel kit), but they aren’t fast (I mean that they don’t have a big aperture). Ultimately I want some 2.8 constant aperture equivalent focal length lenses of the two zooms mentioned above (I am just a little financially impaired).

So why use the 55-200 VR?
To get that shallow depth of field and compression you get when shooting at 200mm. Can you get this from other lenses? Yes but most cost a lot more.

A long focal length like 200mm can make the background seem like it is right behind the subject (compression) but look soft like creamy butter (shallow depth of field). This shot of Airen was taken using the 55-200mm at 200mm, see how the background is like a soft painting?

Sad against a tree

Why use the 50mm prime?
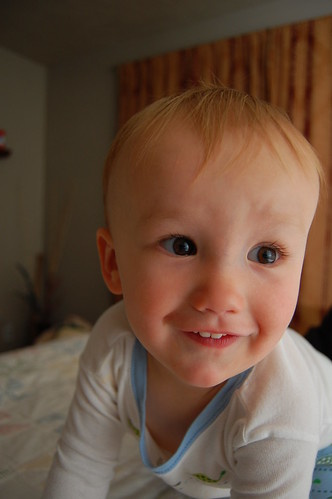
For that 1.8 F stop. When I shoot with this lens it is nearly always wide open aperture. I want that low light goodness. Shooting beautiful natural light usually requires a lens that is fast like the 50mm 1.8. Again you get some great soft backgrounds, this time because the aperture is so big (1.8). The bad is that you really need to be careful how and where you focus otherwise the important part of the pic will be out of focus. Notice how the photo below son's eyes are sharp and in focus but the rest of his face is quickly falling out of focus. Hall mark of the 50mm at 1.8 aperture.

Clayton

Why use the 18-70mm?
For the wide end and for all the normal angles you might need. It just works well, though it doesn’t have any pop except when wide (when I say pop I mean that at most focal lengths it is like vanilla ice cream a bit boring but still the most popular flavor). If you shoot landscape then you want wide 18mm or wider. I don’t so I don’t have any ultra wide lenses. Here is a wide example, notice how everything appears in focus? That is where the wide bodies excel. Here is an example of a photo at ~18mm.

Brittany and Jake

My lights:
I have an SB600 for the on camera stuff (I don’t use direct on camera flash much opting to bounce of walls etc), and use two older (very worn and beat up) speed lights for my lighting (planning to add a fourth light soon). This was due to a suggestion from David Hobby (Strobist) to buy used and I think I made the right decision. I don’t worry too much about the lights (SB 24 and SB 25), and just use them as the tools that they are.

Lighting is sometimes a hot topic (some think it is cheating). Suffice it to say that natural light can be wonderful, so use it when you can find good light. If you don't think lighting is interesting then skip the rest of the gear post...

Lenses are easy to explain but lights are a whole other beast. Suffice it to say that learning about light is what photography is about. Cameras capture light. I don’t know what more to say except just use it and do it. The more you do it (take photos) the better you will get! Now I don't want anyone who reads this to think that you have to use flash or strobe light, natural light can be the best light you will ever find, but learning to use lights can help you see natural light better, making you a better photographer all around.

Start simple, when learning to light, I suggest starting with a single light and then building up from there. After a while you will start thinking in terms of two, three, four and more lights, but I suggest starting with one. In fact most of time I use one light because I don’t want a shoot to get to complicated.

Here is a behind the scenes photo (indoor and a little more complicated).

over under light setup

Here is the result.

Anji BW

Light modifiers:
As you can see I use three different umbrellas sizes 60”, 43” and 33”. Light size is a huge part in the quality of your light. Most of the time you want soft light as it is more flattering. Soft light is achieved when you have a big source relative to the subject (more about it here). The 60” umbrella is great at providing real soft light. The 33” is a little more edgy but still is much softer than a bare flash.

Remember I said the light source size relative to the subject size, so a 60” umbrella 10 feet away will look as soft as a 33” umbrella shot at 3 feet away. Move the light in close to get uber soft light.

Other stuff:
Light stands, clamps, triggers (to trigger the flash when of camera) are other stuff I use. I use a couple of Bogen nano light stands because they are really compact and easy to haul around. Filters to change the color of the light etc. You can really spend a lot of money on extras.

One last note; there is so much more to photography than the gear, such as posing, framing, color, and the list goes on and on. This only touches the gear aspect which is a fairly small part of the equation. Getting all the right gear only gets you so far, the gear after all are just tools, you are the artist using the tools!

Hope this helps out!

Sunday, September 9, 2007

More about taking better pictures: Understanding Exposure & Learning how to use that cool camera!

So I am back with a little more of the blind leading the blind. Everyone ready? Get that cane a moving we are going full steam ahead!

My first tip is to get that camera out of Auto mode as soon as you feel comfortable with how to zoom, and where the shutter button is. Once you take the camera out of auto you are effectively beginning to make decisions about what the photo situation is and what you want the camera to do. Most all cameras have an assortment of controls that work to change settings according to your situation. Try using some of those and see how you like them. For instances if you are photographing fast action events, the sports mode might be the perfect setting for you to use. If you are taking portraits then you could use the portrait setting and tada your camera settings will optimize for a portrait. What does the camera do when you move to those other modes? I really don't know as I never use them but try them out as you may just find they are what you are looking for. I personally am a bit of a control freak. I want my pictures to look a certain way and want to understand completely how to achieve the affect that I want. If this is to much then try out those modes that I talked about. I am positive you will see improvements, and will begin understand better how your camera works and, this is a very good thing.

For those who want to learn a little more read on!

Most cameras have Four special settings that are really all you need. These four settings give you all the creative control you could ever want! Here are the four modes that I use the most:


  • P which is the flexible program mode. This mode sets the exposure automatically (a bit like auto mode) but allows you to change the aperture and shutter speed to any combination that gives your set exposure. This mode is useful as it allows you to control a plethora of other features that you can't access while in Auto mode (more about what aperture and shutter speed are listed in the modes that control those particular items).


  • A or Av which is aperture priority mode. You set the aperture size and the the shutter speed is matched to give correct exposure. Aperture is the size of the hole that lets in light to the sensor in the camera. It functions much like the iris does for for your eyes. A smaller hole lets in less light and a larger hole lets in more light (there are other important functions of the aperture which will be discussed in detail later).


  • S or Tv which is the shutter speed mode. You set the shutter speed and the camera adjusts the aperture to give the correct exposure. This is the amount of time that the sensor is exposed to the light. Unlike our eyes where we allow a continous stream of light the camera captures a frame of light (the sensor is exposed to the scene for a set amount of time). When light is low then we end up with a long amount of time for the shutter to be open. When we have our shutter open for long periods of time blur due to motion may occur. The motion may be from motion of the subject (like an active kid) or from the camera person not holding the camera steady (like someone taking a picture while while suffering from early stages of hypothermia).


  • M which is manual mode. You set aperture and shutter speed, the camera does not change any settings to adjust for exposure (This is the mode I use +75% of the time).

All this information may bring the question: what do you mean by correct exposure? Well this is actually dependent on the photographer. Perhaps it is best to describe it as the brightness (or lack there of) that we see things with our own eyes. Correct exposure would be to make light levels in the photo mimic real life. Sometimes when we chose a different exposure than what we would see with our eyes we get really interesting results.

To understand exposure better here is a little example. Imagine you were to take a picture with your camera in P mode, and your camera reads the correct exposure as:

ISOShutter speedAperture
1001/1008.0


The occassion is your childs surfing match. You know as does everyone that in order to capture the action of a sporting event you should make sure your shutter speed is fast like 1/500 of a second. So what options do we have to increase the shutter speed? If we open up the aperture we can gain shutter speed or we could increase the ISO which would give us an increase in shutter speed. We might make changes to the camera settings that look like something below:


ISOShutter speedAperture
1001/1008.0
1001/2005.6
2001/4005.6
4001/8005.6


These photos were shot at something like 1/400 of a second. A bit faster would have helped capture the action even better.


In Auto mode the camera would have set the first setting and we would have been very disapointed because our surfing star would have been blurry and in a not good way in every photo (ok I know not many in our family will be surfing stars but these are the photos I have taken that I have to work with). Of course there are other times when blur can be good. These are instances where you want to imply motion....

These photos were shot at much slower shutter speeds.


The reason that I have put the largest aperture at 5.6 is because this is ussualy the largest size available for many of the kit lenses and less expensive lenses. So what did we do to get that increase in shutter speed that we needed once when we had the aperture wide open? We moved to the next option, we increased the ISO or the sensitivity. Here is a quick break down of how aperture affects the shutter speed.


Change in shutter speedArperture (1 stop increments)
1X32
2X22
4X16
8X11
16X8
32X5.6
64X4.0
128X2.8
256X2.0


If you were using Auto mode the camera may have chosen to use an aperture of 8.0 but if you could open your aperture to 5.6 you would be able to increase the shutter speed 2x faster!

The other possible way to increase the shutter speed is to increase the sensitivity in the camera or the ISO. ISO is a little more straight forward, every doubling of ISO yeilds a double in shutter speed. This also works the other way around a double in ISO will allow you to close up your aperture a stop (the steps in the change of aperture above are often described as stops).

So why not open up the aperture as wide open as possible all the time? Because aperture affects something else called depth of field. Have you ever seen that photo where the subject was in focus but the back ground was really blurry (this affect is called bokeh)? This is due to a large aperture. This is popular for portrait type of work but not for landscape photos. Stopping down the aperture will decrease this affect and bring more items in the picture into focus as in the examples below.


This is an example of the aperature wide open with the kit lense on my D40 (something like f4.2):


Same picture but the aperature is stopped down to something like f22.


Ya I know this pictures will not win any awards but it is just as an example. Terry's hammock is not an eye catching architectual feature. I think it helps to have a visual as to how aperture affects the depth of field. Pop question, if you are taking a photo of the grand canyon what aperture would you prefer to use?


So this may bring up another question: Then why not bump the ISO to 1600 and leave it there all the time. Well when we bump up the ISO we also bump up the noise in a picture. Often times this noise is just not acceptable. I never use ISO 1600 on my camera due to the amount of noise it introduces. The noise issue is especially true for small point and shoot types of cameras. Of course there are times that getting a noisey picture is better than no picture. And if you get creative there may be times you want that blur thing going!

So lets recap some of the useful tidbits we have learned or remembered:


  • Learning to use the camera is one of the ways to get better pictures. Experiment with different settings and see what you think.


  • To really get control and allow those creative juices to flow, try to think about what you want to achieve and use one of those four magic modes we talked about to get you there. A large number in aperture gives a greater depth of field (remember that big numbers mean a smaller size) and higher shutter speeds freeze action. Small aperture numbers (think big hole) gets that nice blurry background thing going and slow shutter speeds give blur due to motion which can be used to imply motion.


  • Exposure is due to a combination of three things: Aperture, Shutter speed and ISO.

Last thing is to remember to have fun, and remember digital is free so snap away. If you aren't shooting digital I can't really say much as I have no film experience. Happy shooting

Sunday, August 19, 2007

How to take better portraits now!

OK, so these aren't the most recent of pictures though you would never know it. Well Clayton does look chubbier and younger, but its just the camera. You know a camera always adds 2 pounds of baby fat.

After talking to some family and friends, I have decided to give small tidbits on how to improve your photos. Nothing difficult or drastic, but instead I will give hints that even a caveman would think to do. I have decided to do so here and there in the posts that I plan to share. The tips that I will be giving are all simple things. I have only been into photography for a short time and well this is a little of the blind leading the blinder. Hopefully as I improve my photography I can pass on things that will help you improve yours? This time we will talk about how to make better portraits.....


Notice in all the pictures that I am showing as examples, Clayton is not looking at the camera. I like this affect as it gives a different view from what usual portraits do. This is more still life type of photography

One of the really simple things that you can do to improve pictures of people is to fill the picture with the subject. Remove distractions if possible and get in as close as you comfortably can to the subject. This can be a little easier with a good telephoto lens but if you don't have one move your body closer. Notice in these pictures of my son who I love, that he is the subject of the picture. He is the story being told. There is no other story because are no distractions to pull your attention from the subject.....


It always helps to try to get pictures from interesting points of view. When I say this I mean points of view that are different from how we usually see people or even things. With Clayton I either try to get down to his level (remember he is little so we ussualy don't see him at his level) so we are seeing eye to eye as seen in the pictures below (if he was looking me in the eye). This may mean getting down on your knees or even laying down to take the picture. Oh, and don't be afraid of tilting your camera to really fill the frame. The pictures above I tried to find a pleasing but different point of view to capture images from.

Getting your child making great faces is also helpful. For this you will have to learn to be a little creative. Make taking the picture a game, or take the pictures while you distract them with something else. The picture below was taken while I was wrestling with Clayton on the bed. It is really one of my all time favorite.....


With children that are a little older you can get them to pose for you (sometimes). One trick that I have learned is to take a picture of the child and show them the picture on the back of the camera. Most people like the attention and like to look at themselves. Children really aren't all that different. Just beware some children (especially little girls) will not want you to stop taking their picture (like our neighbor's daughter Kayla).....


Others may be flattered enough that you can get that one great image (like the same neighbor's son Buddy).

Sometimes it takes double teaming to get those great photos. Make taking the pictures a game and you may really get a few great photos (this is my Uncle Robert tag teaming to get a picture of my little cousin Aaron)......


One last thing, notice that I grouped several images that were similar but slightly different. This really creates interest as we automatically begin to compare photos.

To recap the tips:
  • Fill the frame with the subject (get in close if necessary).
  • Frame the images from interesting points of view (get on your tummy like a snake if necessary).
  • Make taking pictures fun for the subject (be creative and tag team if necessary).

Monday, August 6, 2007

How to make people look scary/mean

Where do I start? I every once in a while like to play around with the light. Harsh light, like my self portrait (Its the tough guy look). Think Clint Eastwood but short, bald and pudgy.


The reason I bring this up is that the only picture Terry saw on this blog was my self portrait and he didn't recognize me. I know I have the big cuddly teddy bear thing going. When you change the light you change the mood. Hey I know, lets make a phone call from my Clayton look like a sinister threat......


Give all your milk or your gonna get it! Ok so he is so cute that he still looks love-able.

Put two really beautiful people together and with the right light......


This definitely has a Halloween feel to it. This picture was actually taken at my little brothers wedding reception (the one we all thought would never get married).

You all know my youngest brother Wes. A little hard light and ta-da you have a hit man.

This last picture I will probably get in trouble for, but I couldn't resist. They don't call Anji the drill Sargent for nothing....


Anji will probably put me in the dog house for a week when she sees that I published this one.